Concrete damage can sneak up on you, causing headaches and potential structural risks. You might be tempted to tackle repairs yourself, but not all concrete issues are DIY-friendly. Some cracks are warning signs of deeper problems that require professional proficiency. Before grabbing your tools, you’ll want to understand the difference between minor fixes and major repairs. Are you ready to learn how to assess your concrete repair skills and avoid costly mistakes?
Types of Concrete Damage You Might Encounter
Whether you’re a homeowner or property manager, understanding concrete damage is essential for timely repairs and preventing costly structural issues. Foundation repair specialists in Pittsburgh emphasize the importance of addressing structural issues early to prevent extensive and expensive damage.
Expansion cracks can appear due to temperature changes, soil movement, or improper installation. These hairline fractures might seem minor, but they can quickly worsen if left untreated.
Spalling surfaces, characterized by flaking or chipping concrete, often result from moisture penetration, freeze-thaw cycles, or corrosion of internal reinforcing steel. Recognizing these types of damage early helps you address problems before they become expensive repairs, saving you time, money, and potential structural headaches.
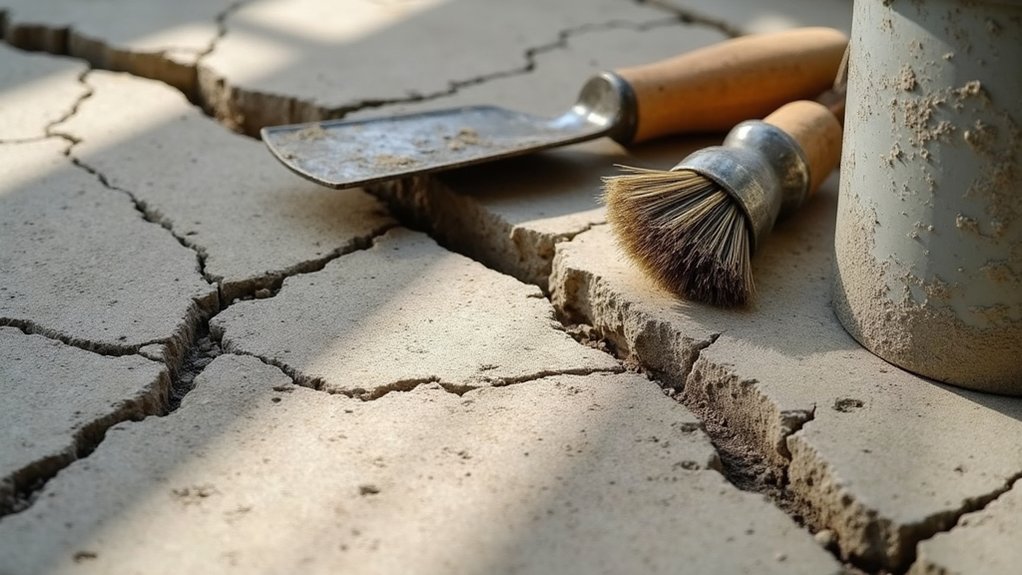
Essential Tools and Materials for DIY Concrete Repair
Since successful concrete repairs depend on having the appropriate equipment, you’ll want to gather a detailed toolkit before starting your project. You’ll need safety gear like gloves and goggles, a trowel, mixing bucket, concrete mix, and patching compound. Understanding concrete mixing techniques and curing requirements is vital for a professional-looking repair. Choose materials that match your specific damage type, whether it’s a small crack or larger surface area. Having the right tools will strengthen your confidence and guarantee you complete the repair efficiently, saving time and money while converting your damaged concrete surface into something robust and renewed. Foundation experts in Pittsburgh recommend carefully assessing structural damage before beginning any concrete repair project.
Assessing Your Personal Skill Level and Limitations
After collecting your tools and materials, it’s time to honestly evaluate your concrete repair abilities. Acknowledging personal constraints is pivotal before starting any DIY project. You’ll want to assess your skill level realistically and consider factors like past home improvement experience, physical fitness, and available time.
Complex repairs might require professional know-how, while minor cracks could be within your capabilities. Don’t feel discouraged if some tasks seem daunting—everyone starts somewhere. Trust your instincts, and if a repair seems overwhelming, it’s okay to seek expert assistance. Your safety and project success matter most.
Small Repairs You Can Handle Yourself
How confident are you about tackling concrete repairs on your own? Small DIY concrete repairs can be manageable if you understand your limitations and approach the project carefully.
Here are some repairs you can handle:
- Filling minor cracks less than 1/4 inch wide
- Addressing surface discoloration with concrete cleaning solutions
- Patching small holes using concrete repair compound
- Smoothing rough surface areas with concrete patch mix
These targeted repairs can save you money and elevate your home maintenance skills. Just remember to prepare properly, work carefully, and know when to call a professional.
When to Call a Professional Concrete Contractor
When should you recognize that a concrete repair job has become too complex for a DIY approach? If you’re facing extensive structural damage, deep cracks, or foundational issues, it’s time to call a professional.
Pros understand proper safety precautions and can assess risks you might miss. They’ll also provide warranties that protect your investment, giving you peace of mind.
Complex repairs involving load-bearing surfaces, significant water damage, or potential structural compromise require expert intervention. Don’t risk further damage or compromise your property’s integrity by attempting repairs beyond your skill level.
Common DIY Concrete Repair Mistakes to Avoid
Because DIY concrete repairs can seem straightforward, many homeowners unknowingly make critical mistakes that compromise the quality and longevity of their repair work. You’ll want to avoid these common pitfalls to guarantee a successful project:
- Poor preparation strategies that skip critical surface cleaning and damage assessment
- Improper concrete mixing techniques leading to weak, unstable repairs
- Neglecting proper moisture and temperature conditions during application
- Rushing the process without allowing adequate curing time
Your careful attention to these details will help you attain professional-looking results and save money on future repairs.
Step-by-Step Guide to Minor Concrete Fixes
Most homeowners can handle minor concrete repairs with the right tools, materials, and a methodical approach.
You’ll want to start by cleaning the damaged area thoroughly, removing loose debris and dirt. When mixing concrete ratios, carefully follow product instructions to guarantee proper consistency. Use a trowel to apply the repair material, pressing firmly and smoothing the surface.
Ensuring concrete cures properly is vital—keep the repaired area moist and protected from direct sunlight for at least 24-48 hours. With patience and attention to detail, you’ll achieve professional-looking results.
Cost Comparison: DIY vs. Professional Concrete Repair
After achieving minor concrete repairs, you’ll want to understand the financial implications of your DIY efforts. Understanding cost factors can help you make smart decisions about your project.
Here’s what you need to know about DIY versus professional concrete repair:
- Estimated material costs for DIY range from $20-$100
- Professional labor cost projections typically start at $500
- Complex repairs might require specialized tools and proficiency
- DIY saves money but increases risk of potential future damage
Frequently Asked Questions
How Long Does Concrete Repair Take to Fully Cure and Harden?
You’ll find concrete repair typically takes 28 days to fully cure, though initial hardening occurs within 24-48 hours. Ideal curing conditions like moisture and temperature greatly impact your project’s success.
Can I Perform Concrete Repairs During Cold or Rainy Weather?
You’ll struggle with concrete repairs in cold or wet conditions. The ideal temperature range is 50-80°F, and harsh weather can weaken your bond, potentially ruining your hard work and project’s integrity.
What Safety Gear Should I Wear When Repairing Concrete?
You’ll need eye protection to shield your eyes from debris and a dust mask to prevent inhaling harmful particles. Always prioritize your safety when tackling concrete repairs.
Are DIY Concrete Repair Products Safe for Indoor and Outdoor Use?
You’ll want to check product labels carefully, focusing on material composition and potential health concerns. Indoor and outdoor repair products vary, so choose wisely to protect your family and living spaces.
How Can I Prevent Future Concrete Damage After Making Repairs?
You’ll want to use proper curing techniques and prepare for seasonal changes by sealing repaired areas, applying waterproof coatings, and addressing drainage issues to protect your concrete from future damage.